Inspection Process
The inspection process on the scanner is hierarchically structured and consists of three levels:
Inspection Order → Inspection Groups → Inspection Features
Each level builds on the previous one. You start by selecting an inspection order, then navigate to the individual inspection groups, and finally record actual values for each feature.
Tip
Inspection orders can also be opened directly from the Output, Consumption, and Warehouse Receipt process dialogs — without searching the inspection order overview manually. See Inspection Orders in Production and Warehouse Processes.
1. Inspection Order Overview
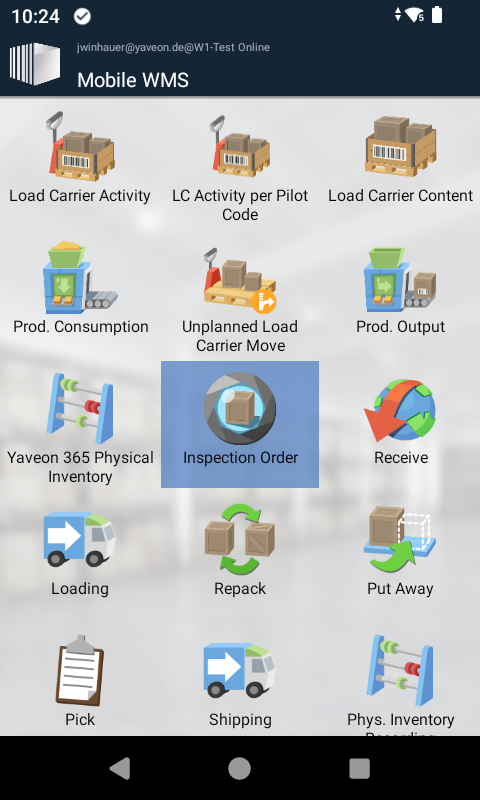
Open the Inspection Order menu item from the scanner's main menu. The overview displays all inspection orders available for mobile processing. Tap on an inspection order to navigate to its inspection groups.
Displayed Information
For each inspection order, the following information is displayed:
- Inspection Order Number and Description
- Inspected Object Number (Item Number)
- Status of the inspection order
- Business Relation (Customer or Vendor)
- Lot Number or Serial Number (if applicable)
- Within Limits Indicator (overall tolerance check status)
Filter Options
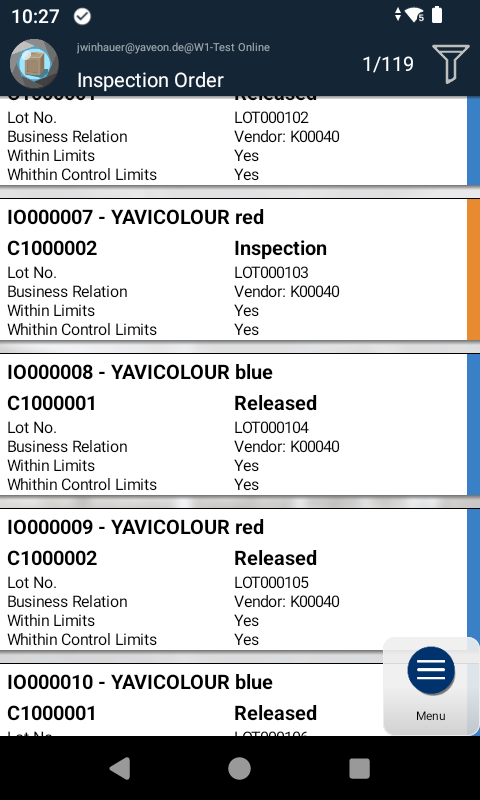
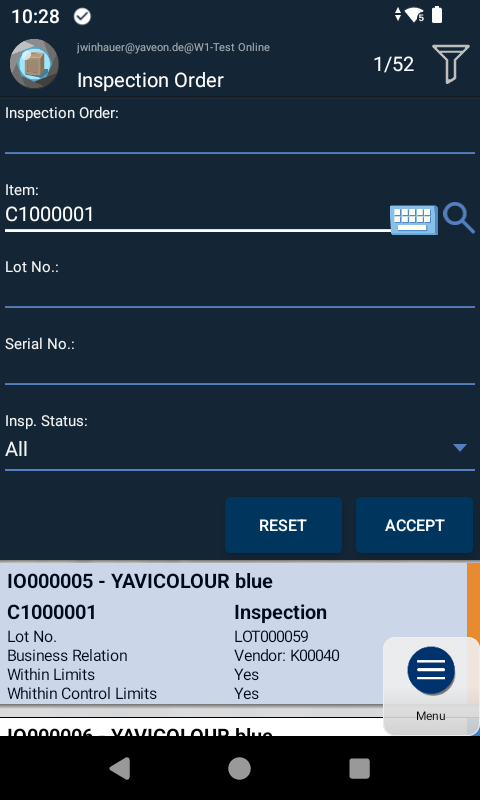
You can filter the list by the following criteria:
| Filter | Description |
|---|---|
| Inspection Order No. | Direct entry of a known order number |
| Item Number | All orders for a specific item |
| Lot Number | All orders for a specific lot |
| Serial Number | All orders for a specific serial number |
| Status | Released or Inspection |
Tip
Scan an inspection order barcode to directly select and open it.
Note
When you scan the product label while the filter is open, the inspection order list is filtered by the item and Lot No..
Here, a 2-stage filtering takes place. First, all inspection orders for this item and lot no. are filtered. If no matching entry is found here, filtering is done by item no. only.
Caution: The lot no. is always written into the filter, even if no matching entry for the lot no. was found.
Status Colors
| Color | Meaning |
|---|---|
| Blue | Inspection not yet started |
| Orange | Inspection has been started but not yet completed |
2. Inspection Groups
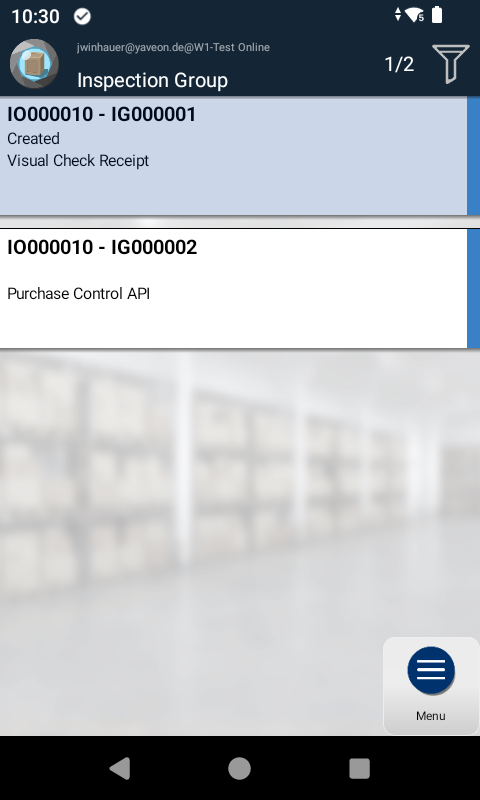
After selecting an inspection order, you arrive at the inspection groups overview. Here, all inspection groups belonging to this order are displayed. Tap on an inspection group to proceed to actual value recording for its features.
Displayed Information
For each inspection group, the following is displayed:
- Inspection Order No. and Inspection Group No.
- Group Status (Created, Inspection, Inspection Finished, Cancelled)
- Description of the inspection group
Filter Options
| Filter | Description |
|---|---|
| Inspection Group No. | Direct entry of a group number |
| Group Status | Filter by processing status |
Tip
Scan an inspection group barcode to directly select and open it.
Status Colors
| Color | Meaning |
|---|---|
| Blue | Group not yet processed |
| Orange | Group is currently being processed |
| Green | All features in the group have been recorded |
3. Actual Value Recording
Overview
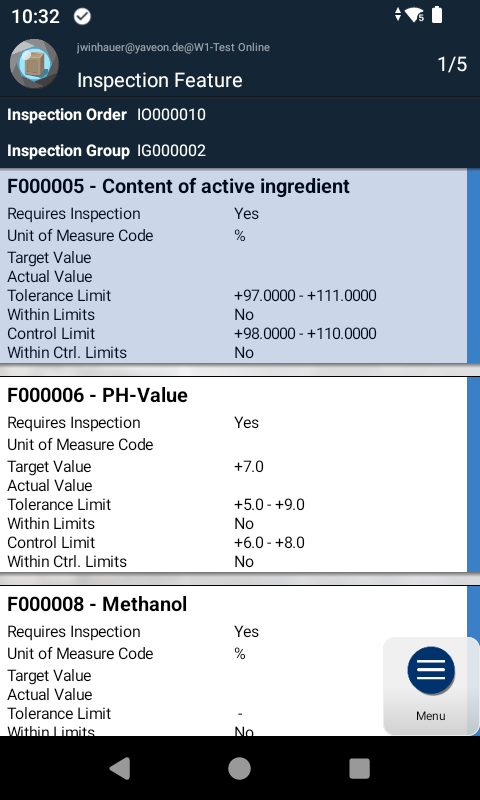
After selecting an inspection group, all inspection features of this group are displayed. Here you record the actual values for each feature by selecting on the feature.
Displayed Information per Feature
| Information | Description |
|---|---|
| Feature No. | Unique number of the inspection feature |
| Description | Name/designation of the feature |
| Requires Inspection | Yes/No - whether recording is necessary |
| Unit | Unit of measure (e.g., mm, kg, °C) |
| Target Value | Expected target value (if enabled in setup) |
| Tolerance Limits | Lower and upper tolerance limit (if enabled) |
| Control Limits | Lower and upper control limit (if enabled) |
| Actual Value | Entry field for the measured value |
| Within Limits | Automatic display after value entry |
Value Entry by Data Type
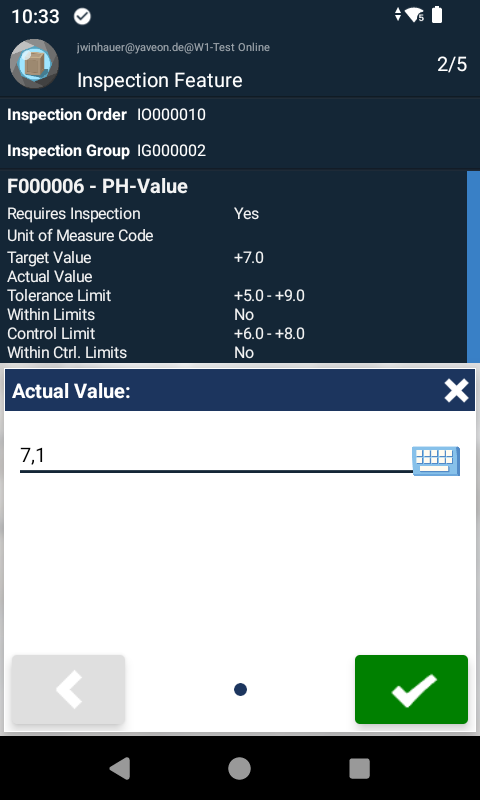
Depending on the configured data type of the feature, an appropriate entry field appears:
| Data Type | Entry Method | Example |
|---|---|---|
| Decimal | Numeric keypad with decimal places | 23.5 °C |
| Text | Free text entry (max. 250 characters) | "Surface uniform" |
| Option | Selection list with predefined values | Grade A / B / C |
| Boolean | Yes/No selection | Yes ✓ / No ✗ |
| Date | Date picker | 02/15/2026 |
Recording Process
- Select feature: Tap on the feature
- Enter value: Enter the measured actual value
- Confirm: The value is immediately transmitted to Business Central. Message is shown and window is closed.
Validation: After value entry, the system automatically displays:
- Within Tolerance Limits: Yes/No
Within Control Limits: Yes/No
This information helps with immediate identification of deviations.
Next feature: Continue with the next feature
Note
Immediate posting: Each recorded value is posted immediately. No separate "Save" or "Post" action is required.
Feature Status Colors
| Color | Meaning |
|---|---|
| Blue | Actual value not yet recorded |
| Green | Actual value has been recorded |
Complete Workflow - Step by Step
Preparation
- Inspection order must be created and released in Business Central
- Scanner must be connected to Business Central
Execution
| Step | Action | Result |
|---|---|---|
| 1 | Open Inspection Order in main menu | List of all available inspection orders |
| 2 | Select inspection order (tap or scan) | Navigation to inspection groups |
| 3 | Select first inspection group | Navigation to inspection features |
| 4 | Record actual value for each feature | Values are posted immediately |
| 5 | After last feature: Back to inspection groups | Group is marked green |
| 6 | Select next inspection group | Record additional features |
| 7 | Repeat until all groups are green | Inspection order fully processed |
Completion
When all inspection groups of an order have the status Green, the mobile inspection is complete. Further completion of the inspection order takes place in Business Central.
Tips for Efficient Work
Tip
Use barcode scanning: Scan inspection orders and inspection groups via barcode for faster navigation.
Tip
Watch status colors: Orient yourself by the color indicators - work through groups without green marking.
Warning
Network connection: Ensure a stable connection to Business Central. Without a connection, no values can be posted.