Shipment Posting
The Shipment Posting dialog allows posting Warehouse Shipments directly from the scanning device — without requiring the full Dispatch & Packaging dialog. It supports both completely and partially picked shipments, including shipments that contain Load Carrier Lines and Shipping Units.
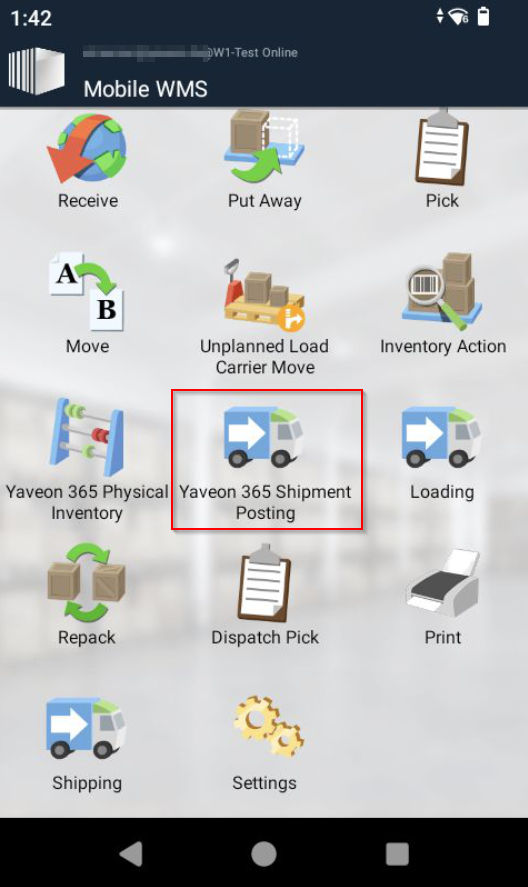
The dialog has its own icon in the main scanning menu and is included in the YAV365 and YAVWMS Mobile Groups.
Shipment List
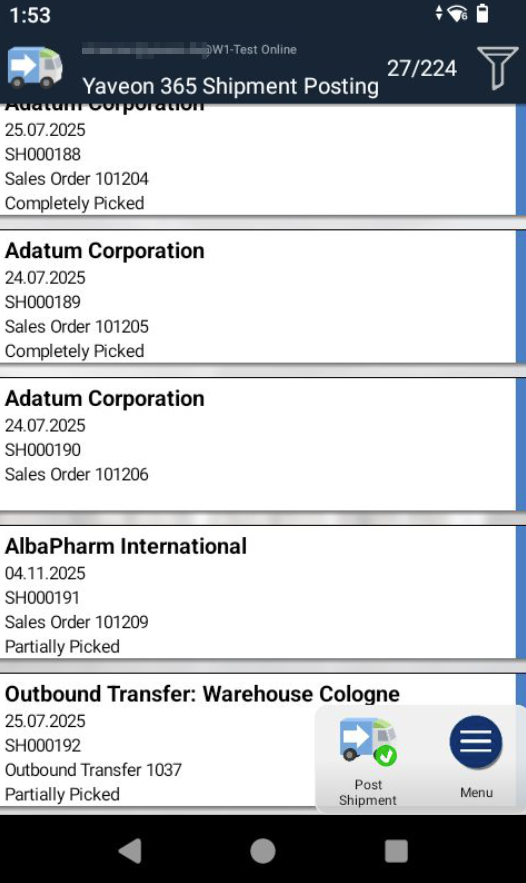
When the dialog is opened, a list of Warehouse Shipments is displayed. The list can be filtered using the following fields:
- Location — filter by warehouse location
- Shipment Date — filter by shipment date
- Assigned User ID — filter by user assignment (All / Only mine / Mine & unassigned)
- Document Status — filter by pick progress: All, Partially Picked, Partially Shipped, Completely Picked
Each shipment shows its current pick status:
| Status | Description |
|---|---|
| Empty | Nothing has been picked yet |
| Partially Picked | Some lines have been picked |
| Completely Picked | All lines are fully picked |
| Partially Shipped | The shipment has been partially posted |
Shipment Lines
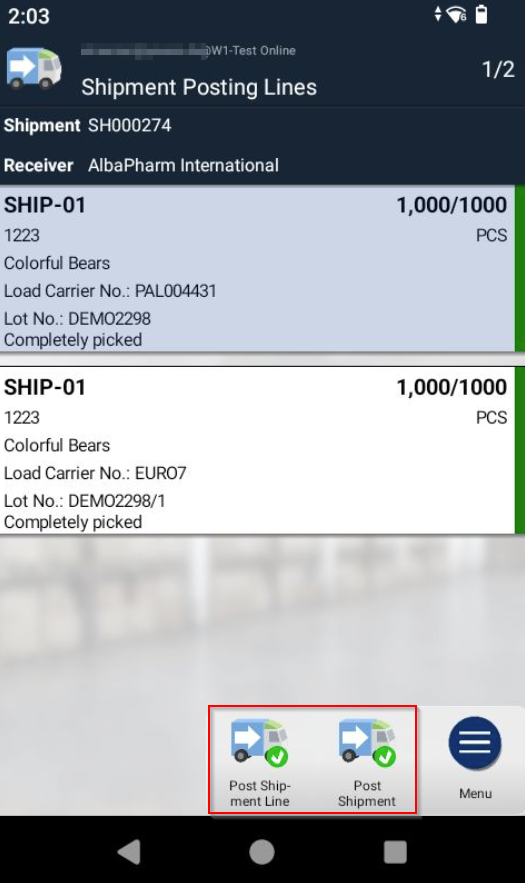
When a Warehouse Shipment is opened, the device shows all shipment lines. Each line displays:
- Item description and item number
- Picked quantity in relation to the total quantity, shown as Qty. Picked / Quantity
- Unit of measure
- Load Carrier numbers, when one or more Load Carriers are linked to the line
- Status text indicating whether the line is Not Picked, Partially Picked, or Completely Picked
Lines are color-coded by pick status:
| Color | Status |
|---|---|
| Blue | Not picked |
| Orange | Partially picked |
| Green | Completely picked |
Note
Shipment lines cannot be edited in this dialog. Picking corrections must be performed in the standard Pick or Dispatch & Packaging dialogs.
Posting Actions
The Shipment Posting dialog provides two posting actions:
| Action | Where it is available | What it does |
|---|---|---|
| Post Shipment | Shipment list and Shipment Lines page | Posts the entire Warehouse Shipment with all its lines. |
| Post Shipment Line | Shipment Lines page | Posts only the selected line. Quantities to ship on all other lines of the same shipment are set to 0 so they remain open and can be processed later. |
Both actions display a confirmation prompt before posting is executed. The Posting Date and Shipment Date on the Warehouse Shipment Header are set to the current work date during posting.
Optionally, both actions can print the delivery note right after posting, see Print Delivery Note on Post.
Posting an Entire Shipment
The Post Shipment action is available from the actions menu of both the shipment list and the Shipment Lines page. After the confirmation prompt is accepted, all registered data is transferred to Business Central and the outbound process for the shipment is completed.
Posting a Single Line
The Post Shipment Line action is available from the actions menu of the Shipment Lines page and refers to the currently selected line. After the confirmation prompt is accepted, only that line is posted; all other lines remain in the open Warehouse Shipment with their Qty. to Ship set to 0 and can be picked or posted in a later step.
Note
Warehouse Shipments for locations that do not use picks are also supported and can be posted.
Completely and Partially Picked Shipments
Both completely and partially picked shipments can be posted. Whether a partial posting is allowed depends on the Shipping Advice field on the related Sales Order Header (propagated to the Warehouse Shipment):
- Partial — the shipment can be posted even if not all lines are fully picked.
- Complete — all lines belonging to the same Sales Order must be shipped together. A partial posting is blocked with an error.
The shipping advice check applies both when posting the entire shipment and when posting a single line while other lines of the same shipment are still open.
User Setup — Post Warehouse Shipment
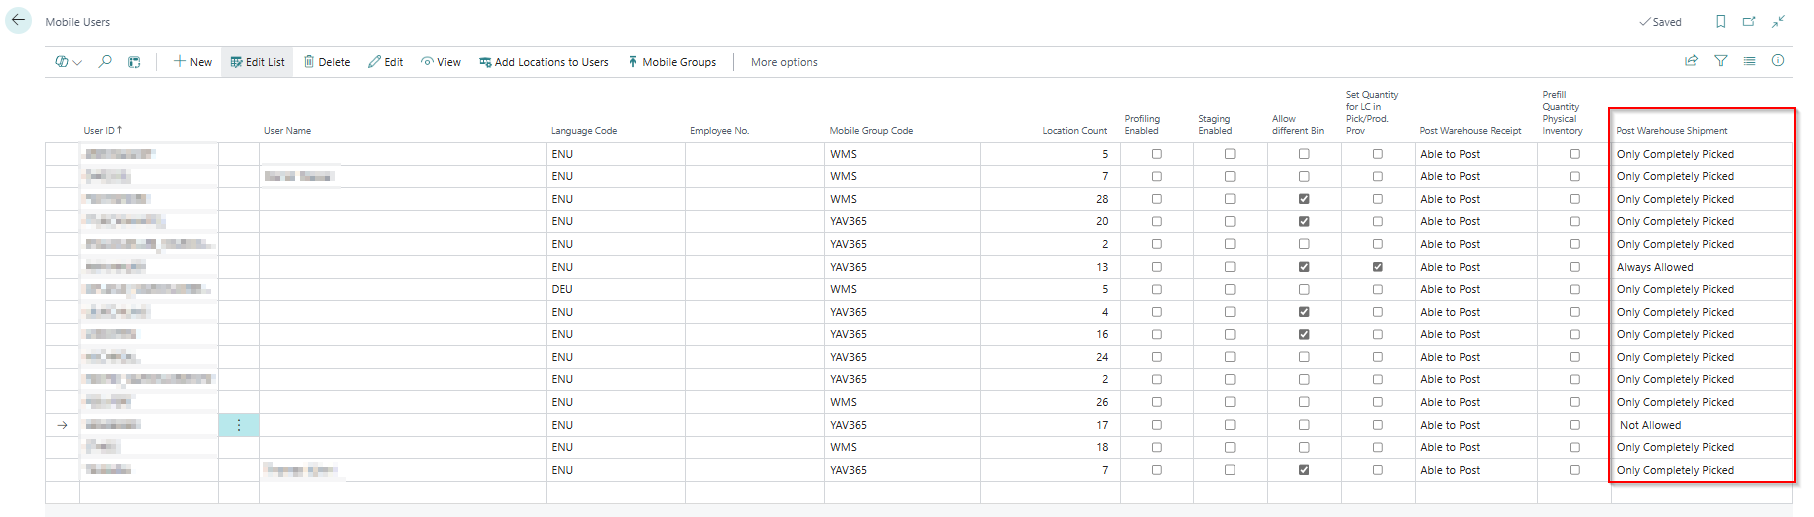
Whether a mobile user is allowed to post shipments is controlled by the Post Warehouse Shipment field on the Mobile User record in Business Central:
| Setting | Behavior |
|---|---|
| Only Completely Picked | The user can only post if the shipment, or — for line posting — the selected line, is completely picked. |
| Always Allowed | The user can always post, regardless of pick completion (subject to Shipping Advice). |
| Not Allowed | Posting is disabled for this user. The Post Shipment and Post Shipment Line actions return an error when used. |
Mobile WMS Setup — Loading Suggestion
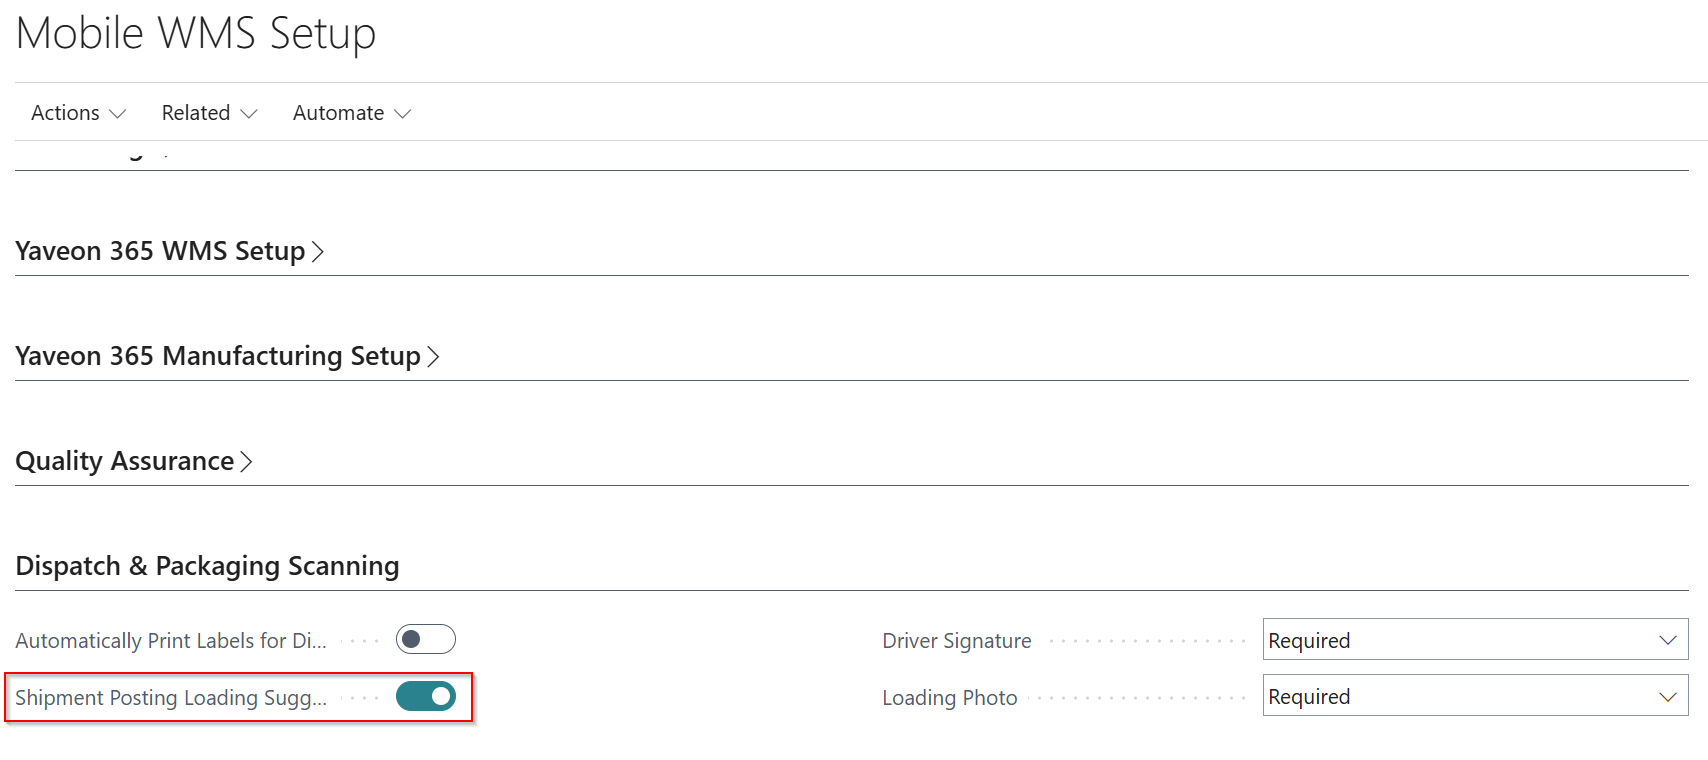
The Shipment Posting Loading Suggestion field in the Mobile WMS Setup (Dispatch & Packaging Scanning section) controls whether the user is prompted to start loading after a successful posting:
- Enabled: If a Dispatch Order is linked to the shipment, the message "Shipment has been posted. Loading can be started" appears after posting.
- Disabled: The message "Shipment has been posted" appears without the loading prompt.
Print Delivery Note on Post
With the Print Delivery Note on Post field in the Mobile WMS Setup (Yaveon 365 WMS Setup section), the delivery note is printed automatically after a successful posting from the scanning device. The delivery note no longer has to be looked up and printed at a Business Central workstation.
Printing applies to both posting actions:
| Action | What is printed |
|---|---|
| Post Shipment | The posted warehouse shipment created by this posting. |
| Post Shipment Line | The posted warehouse shipment created by this posting – it only contains the posted line. |
For partial postings, each posting creates its own posted warehouse shipment; the delivery note of the current posting is printed.
Printer Selection on the Scanning Device
Which printers can be used follows from the Printing Setup: the printer must be available for the delivery note report and match the location of the Warehouse Shipment.
| Available printers | Behavior on the scanning device |
|---|---|
| Several | A printer step opens before posting. The user selects a printer and confirms. If the empty entry is selected, the shipment is posted without printing. |
| Exactly one | No printer step appears. The delivery note is printed on this printer without interrupting the flow. |
| None | No printer step appears. The Warehouse Shipment is posted, no delivery note is printed. |
Report and Layout
The report Warehouse Posted Shipment is printed. When the app is installed or updated, an enabled entry with the label type Delivery Note is created automatically in the Mobile Reports for this purpose. On this entry, the report and layout can be changed and the printers can be assigned, see Printing Setup.
Note
If the delivery note cannot be printed, for example because the entry in the Mobile Reports was disabled, the Warehouse Shipment still remains posted. In addition to the posting message, the user receives the message "The delivery note for warehouse shipment [No.] could not be printed." on the scanning device. The delivery note can then be printed in Business Central from the posted warehouse shipment.
Note
The Print Shipment on Post field in the Mobile Report Print Setup has no effect on the Shipment Posting dialog. For this dialog, printing is controlled only by the Print Delivery Note on Post field.
Important
If a Warehouse Shipment is updated in Business Central while a mobile user is viewing it, the mobile user must use the Update function from the menu to refresh the data on the device.