Company Paper
The Company Paper functionality can be used to replace the logo section and the footer section of a document with pictures. This can be used when documents are normally printed on pre-printed company paper. However, when they are printed as PDFs or send by E-Mail, the pre-printed company paper can be replaced by those two pictures.
The setup of the Company Paper can be made for all documents in the ProBatch 365 Base Corporate Design Documents Setup, for a single document in the Report-Specific Setup or for single vendors and customers in the Custom Specific Setup.
To print on Company Paper it is necessary to deactivate the options Print Logo and Print Footer in the Report Print Details of the setup pages. If both options are deactivated, the logo area and footer area are empty, as shown in the following picture. Thus, the receipt can be printed on a pre-printed company paper.
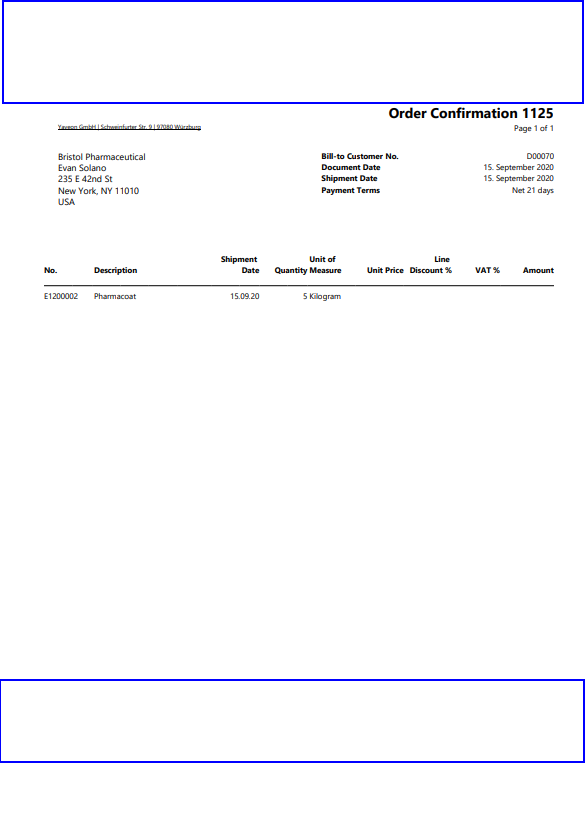
Company Paper Picture
However, if the document is printed as a PDF or sent by e-mail, the logo area and footer area will remain empty. To prevent this, two images can be uploaded in the Company Paper Image FactBox of the respective setup page. These will replace the logo area and footer in the document.
To import these images, the FactBoxes must be opened by clicking on the i icon at the top right corner of the setup page. Clicking on the name of the FactBox Company Paper Image, the following three options appear.
The options are:
Import
With this action, an image can be imported. If an image is already uploaded, this option can be used to replace the current image.
Export
With this action, an existing image can be exported.
Delete
With this call, an existing image can be deleted.
When starting one of the options, a query appears for which area this image should be imported, Company Paper Image Header or Company Paper Image Footer. Here you must select the area for which the image is intended.
To get the images in the right shape, the resolution should be 300 DPI. This will create a balance between quality and PDF size. It is recommended to use the file type .PNG .
Note
When testing, it is recommended not to work with Microsoft Paint, because here the DPI are lowered. GIMP can be used instead, for example.
To show the images correctly, it is recommended to adhere to the following dimensions (width x height) in the different Corporate Design Standard Layouts. These sizes correspond to the logo area and footer area.
| CD Layout Code | CD Layout Description | Report Description | Picture Dimensions |
|---|---|---|---|
| SYS_SMHDRNOEMAIL | System Layout Small Header (without Electr. Mail Section) | Rep_CDSmHLNoEMail.rdl | Header: 21 cm x 5,3 cm Footer: 21 cm x 2,9 cm |
| SYS_SMALLHDR | System Layout Small Header | Rep_CDSmallHdrLayout.rdl | Header: 21 cm x 5,3 cm Footer: 21 cm x 2,9 cm |
| SYS_BH_NOEMAIL | System Layout Big Header (without Electr. Mail Section) | Rep_CDBigHLNoEMail.rdl | Header: 21cm x 9,1 cm Footer: 21cm x 2,9 cm |
| SYS_BIGHDR | System Layout Big Header | Rep_CDBigHdrLayout.rdl | Header: 21 cm x 10,4 cm Footer: 21 cm x 2,9 cm |
| SYS_FOURCFNOEMAIL | System Layout Four Columns Footer (without Electr. Mail Section) | Rep_CDSH4CFNEL.rdl | Header: 21cm x 5,3 cm Footer: 21cm x 2,9 cm |
| SYS_FOURCOLFOOTER | System Layout Four Columns Footer | Rep_CDSHdr4ColFL.rdl | Header: 21cm x 5,3 cm Footer: 21 cm x 2,9 cm |
| SYS_RIGHTADDRHDR | System Layout Right Address Header | Rep_CDSHAdrightL.rdl | Header: 21cm x 5,3 cm Footer: 21 cm x 2,9 cm |
After the import, the images are displayed in the FactBox.
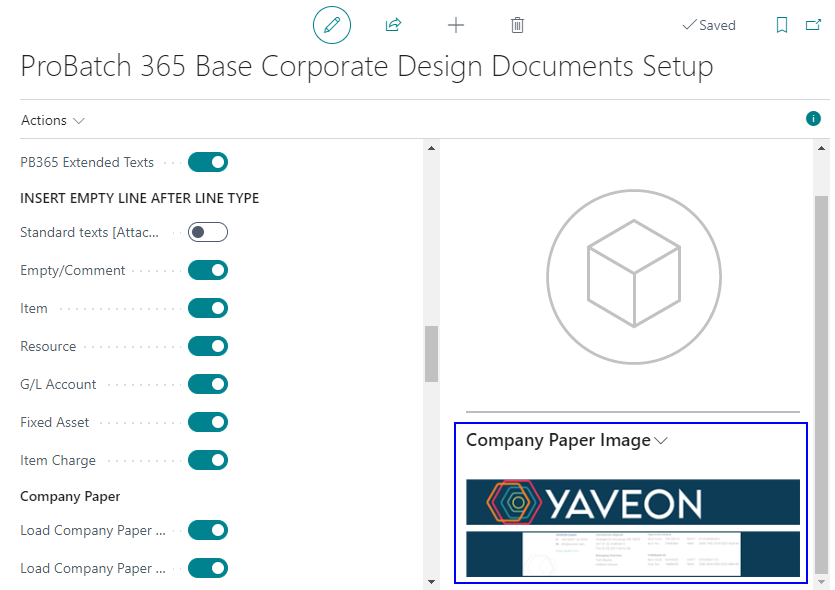
Presets for printing
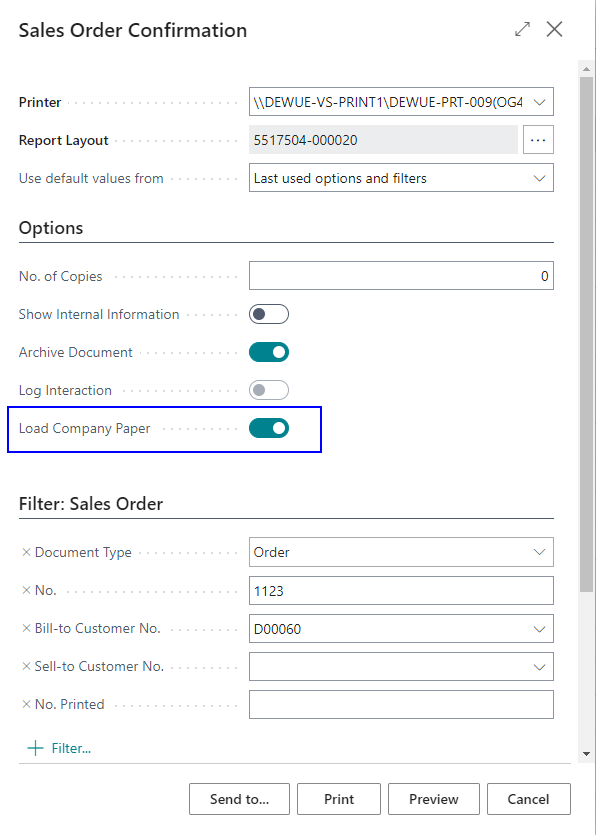
In the Report Print Details of the ProBatch 365 Base Corporate Design Documents Setup there are two options, which can be used as the as default values for loading the company papers.
Load Company Paper with Dialog - Default Value
The option Load Company Paper with Dialog - Default Value sets a default value for the option Load Company Paper in printing dialogs. The option Load Company Paper decides, if the company paper pictures are added to the printed document. The value can be changed in the printing dialog, so the user can decide if the company paper is added to the document. This is important, when creating a PDF, and not printing on a printer.
Load Company Paper without Dialog - Default Value
The option Load Company Paper without Dialog - Default Value decides, if the company paper pictures are added to a documented, that is created without a printing dialog, e.g. when send per E-Mail. This setup cannot be changed in E-Mail sending process. This setup can also be made in report-specific and custom specific.
Note
This setup only becomes active after logging off and in again from the system.
Printing Example
If you load the images from the setup, they will be printed accordingly. See the following example.
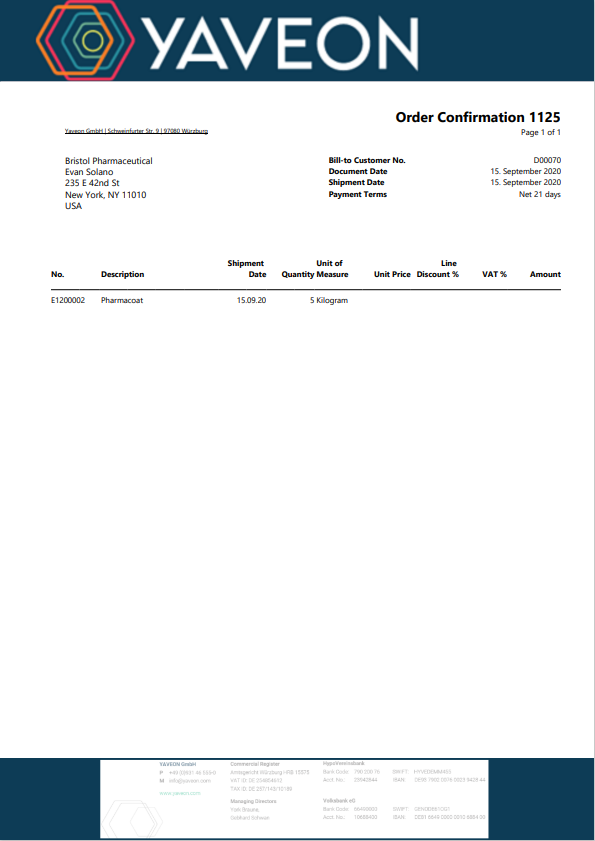
Note
To use the function Company Paper it might be necessary to re-initialize the Corporate Design System Layouts. This is necessary, if the system was updated to a ProBatch 365 Version 3.5, 4.2, 5.0 or higher. The Layouts can be re-initialized with the Function Initialize.