Inspection plans
The basis of a Inspection Order is the Inspection Plan. Here you define which inspections are to be made for which inspection target in which process with which parameters and inspection equipment at which inspection location. The data for the inspections to be created is defined in the system in a hierarchical structure:
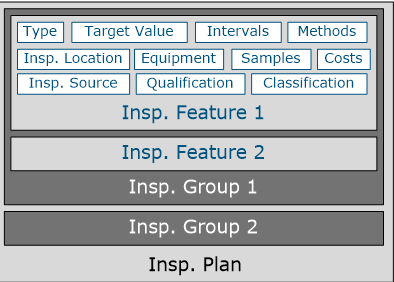
The structure shown here is intended to illustrate that the creation of an inspection plan is the last step in the setup process in order to create inspection orders. You must therefore first have defined the general basic data and set up the system so that this can then be used in an inspection plan.
Creating an Inspection Plan Header
- With the action New you can create a new Inspection Plan.
- In the field No., you can automatically assign the next free number from the number series by pressing Enter. Alternatively it is possible to enter a number manually.
- The version = 1 is then automatically entered in the Version code field. There can be several versions for each inspection plan number. These versions can differ in the data entered. If the system finds several valid (certified) inspection plans when creating an inspection order, the version with the highest number is used.
Using the Inspection Object Type field, you can choose whether you want to create an inspection plan for:
- an Item
- an Inspection Equipment
- an Object
- a Base Item
- a QA Item Group
- an Insp. Equipment Group
Depending on the inspection object type selected, you can select a value from the corresponding table in the field Inspection Object No..
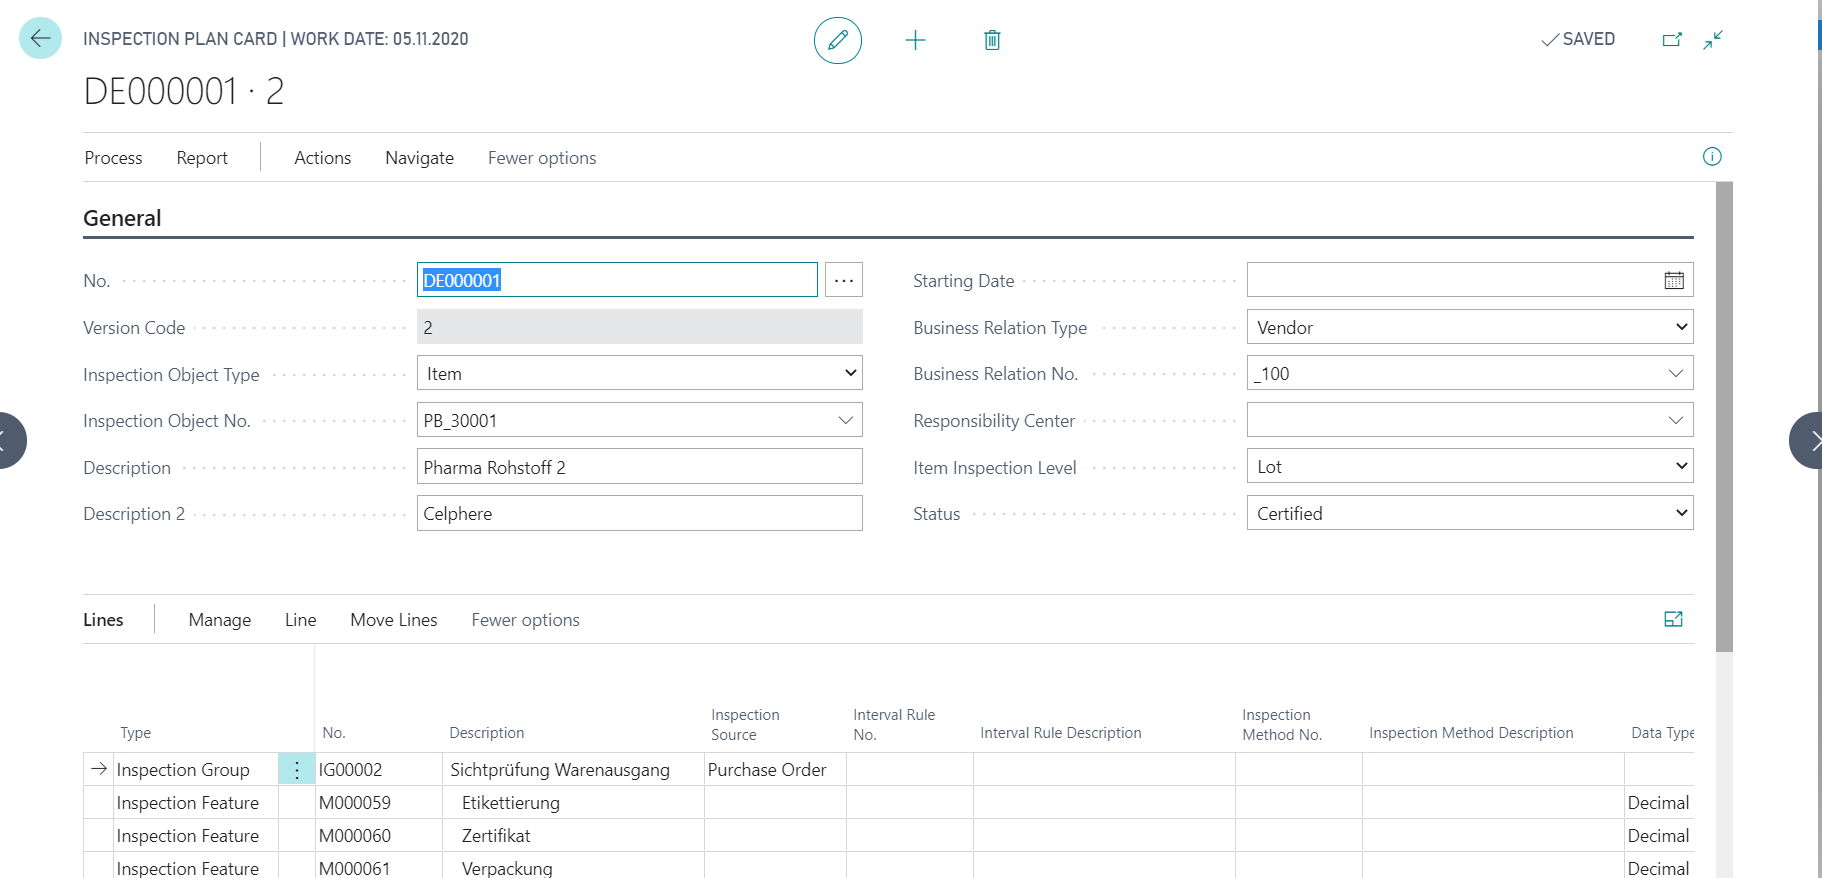
Inspection Plan Header creation - Inspection Object Type related fields
If you have selected the inspection object type item, base item or item group, you must and can maintain the field Item Inspection Level and thereby define the level of detail of the inspection. The following options are available:
- "Empty": Initial status. The inspection plan cannot be certified without an item inspection level.
- Item: The Inspection is only carried out at item level, identification of individual batches is not possible
- Serial No: The inspection item is a serial number
- Lot: Inspection orders are created per lot number
- Inspection Lot: Inspection orders are created for the Inspection Lot (see Lot data). This means that the inspection does not take place for each individual container, but only once for the Inspection Lot.
You can also use the field Business Relation Type to create inspection plans for a Customer, QA Customer Group, Vendor or QA Vendor Group and to create special customer- or vendor-related inspection plans. Depending on the selected Business Relation Type, you can then select
- a Vendor No.
- a Customer No.
- a Vendor Group No.
- a Customer Group No.
in the field Business Relation No..
Creation of Inspection Plan Lines
You must define the inspections to be carried out for this inspection object in the inspection plan lines. In the first line of the inspection plan, enter a inspection group as Type and select a inspection group in the Number field using the lookup. The system then automatically copies the inspection features assigned to the inspection group and the master data stored. You can supplement or change the master data for specific inspection plans.
Note
The first line of an inspection plan must always be of the Type inspection group, since the inspection group determines the Inspection Source. It is therefore essential that you create at least one inspection group in the system. An inspection group can be entered several times in an inspection plan. The inspection source of the inspection group is only copied the first time it is entered. For all other entries, the field remains empty and must be filled manually with a different inspection origin. This is checked when the inspection plan is certified.
By entering an Interval Rule, you can influence the inspection frequency of an inspection group or individual inspection features. If you define the Interval Rule No. for the inspection group, it applies to all subordinate inspection features. You can also assign interval rules to individual inspection features. This procedure also allows you to use different interval rule numbers within a inspection group.
If you have decided to work with the Feature / Inspection Method Setup, you can enter the Inspection Method No. to transfer the corresponding fields for sample drawing and/or inspection costs. The fields are only transferred if a corresponding combination of inspection feature and inspection methods exists and is certified in the system. You can also manually enter the corresponding fields for each inspection feature. You can find a description of the fields in the Feature / Inspection Method Setup.
You can define the Target Value here, if it was not already defined for the inspection feature or item feature. Depending on the Decimal data type of an inspection feature, you can also define the Limit Values.
Note
You can maintain the Target Value, as well as the Tolerance and Control Limits for the Inspection Feature (if useful). These values are then used as default values in the Inspection Feature and Inspection Plan. When creating an inspection plan line with Type = Inspection Feature, the target value and limits are copied from the item feature if the field Use Target Values of Item is set to YES in the Quality Assurance Setup. If the flag is NO or no item feature exists, the values are copied from the Inspection Feature. When copying an Inspection Plan the value is copied as well.
| Field | Description |
|---|---|
| Target Value | If a target value is defined, you can define it here |
| Lower Tolerance Limit | Below this value a measured value in the inspection order is no longer within the tolerance range |
| Lower Control Limit | If you want to react to measurements within a process before an inspection value is outside the tolerance limits, you can also define an control limit |
| Upper Control Limit | Analogous to the lower control limit, an upper control limit can be defined |
| Upper Tolerance Limit | Above this value a measured value in the inspection order is no longer within the tolerance range |
Further data for Inspection Plan lines
Each line of the inspection plan can be called up in a map view. In this view you can get a compact overview of the large number of inspection plan row fields and adjust them. The changes are applied to the inspection plan line.
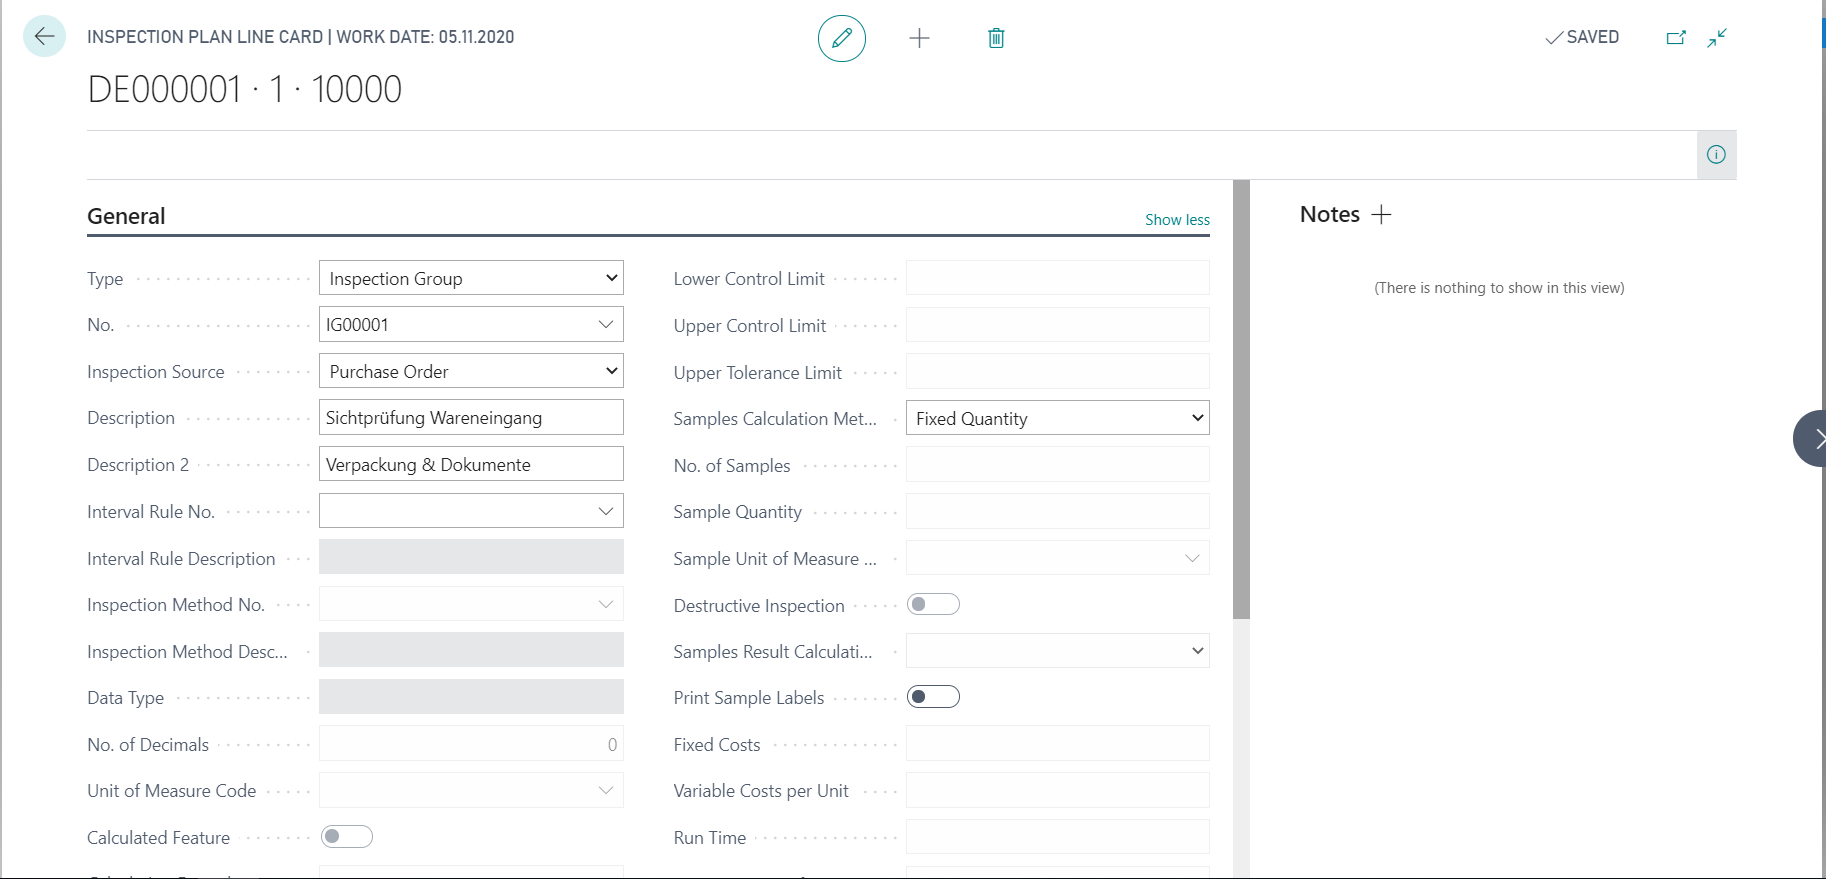
The following options and functions are also available here:
- You can view or add Translations and Comments for inspection groups and inspection features.
- You can define PB365 Line Texts. For more information, refer to the chapter Overview - Text Module.
- You can assign the inspection feature an inspection equipment. If inspection equipment has already been assigned to the inspection feature, it is displayed here.
Note
If a locked inspection feature is assigned to an inspection feature, you can see this in the lateral info boxes for the inspection plan and the inspection plan lines. Under these circumstances, certification of the inspection plan is not possible and is prevented by the system.
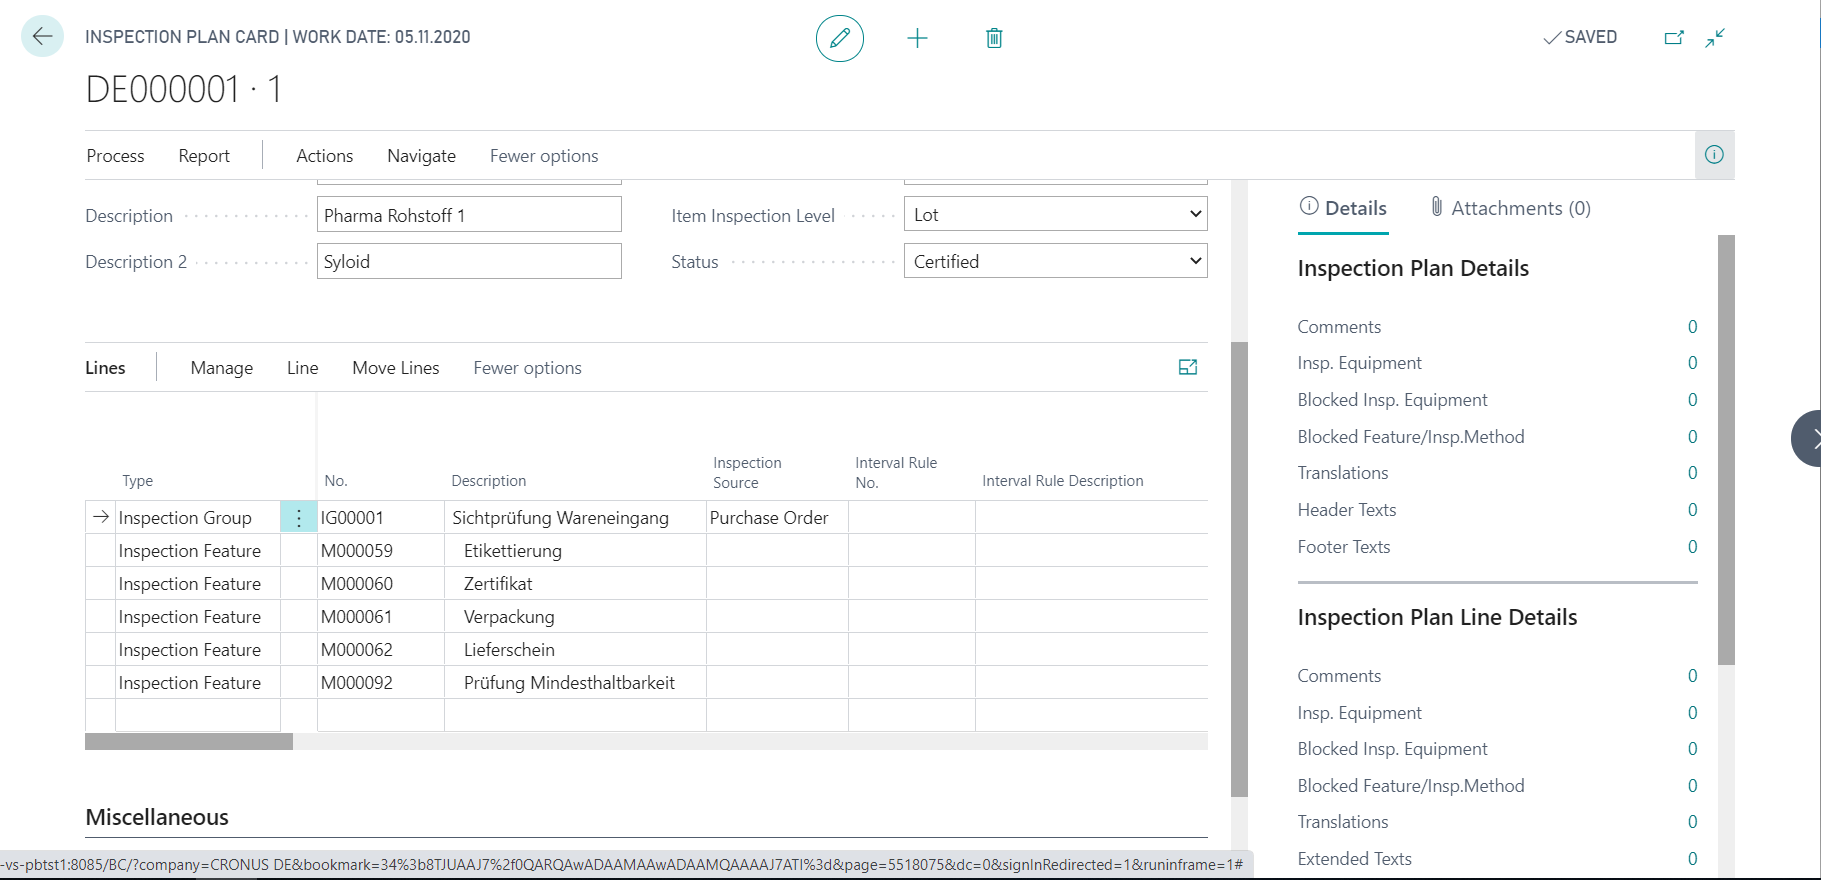
- To copy or move individual or several lines of an inspection plan, the following actions are available under Move Lines:
| Action | Description |
|---|---|
| Copy -> Clipboard | Copies the currently selected lines to the clipboard |
| Cut -> Clipboard | Copies the currently selected lines to the clipboard and deletes them from the current document. The lines are only deleted permanently after the action Paste from clipboard has been selected in addition to this action. |
| Paste from Clipboard | Pastes the lines previously pasted to the clipboard |
| Move Up | Moves the current line up one line |
| Move Down | Moves the current line down one line |
Further data on the Inspection Plan header and certification Inspection Plan
As with the inspection plan lines, there are other maintenance options available:
- You can view or add Translations and define Comments for the inspection plan.
- You can define PB365 Header Texts and PB365 Footer Texts. You can find more information under Overview - Text Module.
- Using the action Usage, you can display an overview of the inspection orders in which the inspection plan is used. If required, you can display the respective document from this screen using the action Show.
Once all data has been entered in the inspection plan for the various processes and the inspections required there, you can set the Status of the inspection plan to certified. You can no longer change certified inspection plans. If you want to make changes again, you must reset the status to Under Development or New. If the inspection plans are no longer current, you can set the status to Closed.